Diferencia entre revisiones de «Cube3: Assembling»
De WikiRobotics
(→Fotos) |
(→Noticias) |
||
| (No se muestran 2 ediciones intermedias del mismo usuario) | |||
| Línea 64: | Línea 64: | ||
|} | |} | ||
| − | == | + | == Links == |
| + | * [[Training on modular snake robots|Training on modular snake robots (Main page)]] | ||
* [[Robot Modular: Cube3]] | * [[Robot Modular: Cube3]] | ||
* [[Robot Modular:Minicube-I|Minicube-I]] | * [[Robot Modular:Minicube-I|Minicube-I]] | ||
* [[Unimod]] | * [[Unimod]] | ||
| − | * [[Módulos MY]] | + | * [[Módulos MY|MY1 modules]] |
| − | * [[Skycube| | + | * [[Skycube|Skycube board]] |
| − | == | + | == News == |
| − | * ''' | + | * '''23/Feb/2011''': This page is created! |
| − | |||
[[Categoría:Robots modulares]] | [[Categoría:Robots modulares]] | ||
Revisión actual del 04:42 23 feb 2011
Contenido
Introduction
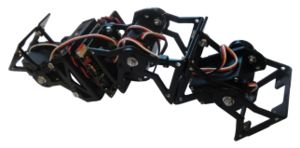
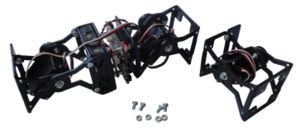
Cube3 is a 1D topology pitch-pitch modular robot. It consist of three modules. For assembling it the following parts are needed:
- One MY1 module (Assembly instructions)
- One Minicube-I robot (Minicube-I: Assembling)
- 4 M3 bolts
- 4 M3 nuts
Assembling
Step 0: Perform the previous assembly
To assembly Cube3 it is necessary to first build the following parts:
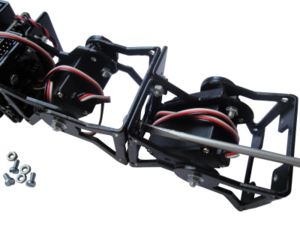
Step 1: Screw the module to Minicube-I
Step 2: Connect the servo to the Skycube board
Connect the module's servo to the Skycube board. It can be connected to any of the free 3-pin headers
| |
Step 3 (Optional) Secure the wires with cable ties
Optionally, cable ties can be used to secure the wires. This step is similar to Minicube-I:_Assembling#Step_3_.28Optional.29_Secure_the_cables_using_cable_ties
Pictures
| Photo album |
Links
- Training on modular snake robots (Main page)
- Robot Modular: Cube3
- Minicube-I
- Unimod
- MY1 modules
- Skycube board
News
- 23/Feb/2011: This page is created!


