Diferencia entre revisiones de «Cube3: Assembling»
De WikiRobotics
(→Introduction) |
|||
| Línea 2: | Línea 2: | ||
== Introduction == | == Introduction == | ||
| − | [[Robot Modular: Cube3|Cube3]] | + | [[Robot Modular: Cube3|Cube3]] is a 1D topology pitch-pitch modular robot. It consist of three modules. For assembling it the following parts are needed: |
| − | + | * One '''MY1 module''' ([[MY1 modules: assembling|Assembly instructions]]) | |
| − | * | + | * One '''Minicube-I''' robot ([[Minicube-I: Assembling]]) |
| − | * | + | * 4 M3 bolts |
| − | * 4 | + | * 4 M3 nuts |
| − | * 4 | ||
{| | {| | ||
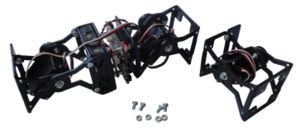
| − | || [[Imagen:Cube3-inicio-r2.jpg|thumb|300px|''' | + | || [[Imagen:Cube3-inicio-r2.jpg|thumb|300px|'''Beginning''': Parts needed for assembling Cube3 (''Click to enlarge'')]] |
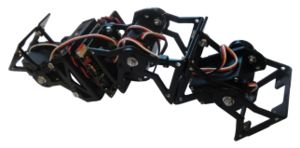
| − | || [[Imagen:Cube3-fin-r2.jpg|thumb|300px|''' | + | || [[Imagen:Cube3-fin-r2.jpg|thumb|300px|'''End''': Cube3 robot (''Click to enlarge'')]] |
|} | |} | ||
Revisión del 04:28 23 feb 2011
Contenido
Introduction
Cube3 is a 1D topology pitch-pitch modular robot. It consist of three modules. For assembling it the following parts are needed:
- One MY1 module (Assembly instructions)
- One Minicube-I robot (Minicube-I: Assembling)
- 4 M3 bolts
- 4 M3 nuts
Montaje
Paso 0: Realizar los montajes previos
Para montar a Cube3 es hay que montar los siguientes elementos, si no se ha hecho ya previamente:
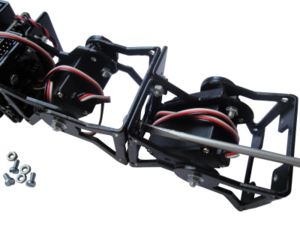
Paso 1: Atornillar el módulo a Minicube-I
Paso 2: Conectar el servo a la Skycube
Conectar el servo del módulo a la Skycube. Se puede conectar en cualquiera de los conectores libres
| |
Paso 3 (Opcional) Fijar los cables con bridas
Opcionalmente, se pueden usar bridas para fijar los cables. Este paso es similar al paso 3 del montaje de Minicube-I
Fotos
| Álbum de fotos |
Enlaces
Noticias
- 03/Abril/2010: Primera versión terminada
- 31/Marzo/2010: Comenzada esta página


