Diferencia entre revisiones de «OpenMR: Servocontroller examples»
(→Test-servocontroller-3: Saving the servo's angles into a file) |
(→Test-servocontroller-3: Saving the servo's angles into a file) |
||
| Línea 64: | Línea 64: | ||
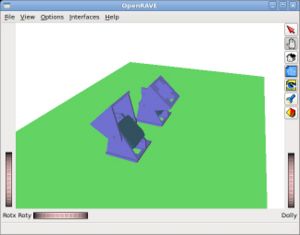
| [[Imagen:Openmr-test-servocontroller-3-1.jpg|thumb|300px|'''Test-servocontroller-3''': Initial Servo positions (''click to enlarge'')]] | | [[Imagen:Openmr-test-servocontroller-3-1.jpg|thumb|300px|'''Test-servocontroller-3''': Initial Servo positions (''click to enlarge'')]] | ||
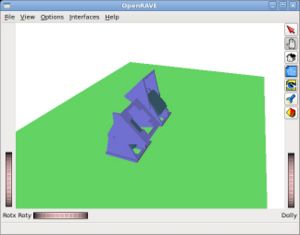
| [[Imagen:Openmr-test-servocontroller-3-2.jpg|thumb|300px|'''Test-servocontroller-3''': Final Servo positions (''click to enlarge'')]] | | [[Imagen:Openmr-test-servocontroller-3-2.jpg|thumb|300px|'''Test-servocontroller-3''': Final Servo positions (''click to enlarge'')]] | ||
| + | |} | ||
| + | |||
| + | {| | ||
| + | | [[Imagen:Openmr-test-servocontroller-3-3.jpg|thumb|300px|'''Test-servocontroller-3''': The servo's angle in time (''click to enlarge'')]] | ||
| + | | | ||
|} | |} | ||
Revisión del 03:30 13 jul 2010
Contenido
Introduction
Test-servocontroller-1: Set the position of one servo
Example of the setpos1 command to set the position of the servo 0. The module's angle is set to 45 and -45 degrees alternatively.
In the begining the environmnet is created (loaded from the file models/Unimod1.env.xml) and the camera view is set. The environment consist of one robot with only one module (Unimod).
First the pointer to the robot(probot) is obtained from the environment (penv). In a general scence, there can be multiple robots. But in this example there is only one robot (robot number 0):
 std::vector<RobotBasePtr> robots;
 penv->GetRobots(robots);
 RobotBasePtr probot = robots[0];
Then the servocontroller is set as the robot controller:
 ControllerBasePtr pcontroller = penv->CreateController("servocontroller");
 probot->SetController(pcontroller,"");
In the main loop, the serpos1 command is used to set the module's angle:
 while(1) {
   is << "setpos1 0 45 ";
   pcontroller->SendCommand(os,is);
   sleep(1);

   is << "setpos1 0 -45 ";
   pcontroller->SendCommand(os,is);
   sleep(1);
 }
Test-servocontroller-2: Set the position of two servos
Example of the setpos and setpos1 commands to set the position of two servos. Both modul angles are set to 45 and -45 degrees alternatively.
In the main loop, the position of the servos is set to 45 and -45 degrees using the setpos command.
 is << "setpos 45 -45 ";
 pcontroller->SendCommand(os,is);
 sleep(1);
Then, the position is set to -45 and 45 but using the setpos1 command (it can also be used the setpos command, of course)
 is << "setpos1 0 -45 ";
 pcontroller->SendCommand(os,is);

 is << "setpos1 1 45 ";
 pcontroller->SendCommand(os,is);

 sleep(1);
Test-servocontroller-3: Saving the servo's angles into a file
Example of the record command. The two servos are set to -45 and 45 respectivelly. The servo's angle at every simulation tic are stored into the test1.m file.


